Rotations (Edexcel GCSE Maths): Revision Note
Did this video help you?
Rotations
What is a rotation?
A rotation turns a shape around a point
This is called the centre of rotation
The rotated image is the same size as the original image
It will have a new position and orientation
If the centre is a point on the original shape then that point is not changed by the rotation
It is called an invariant point
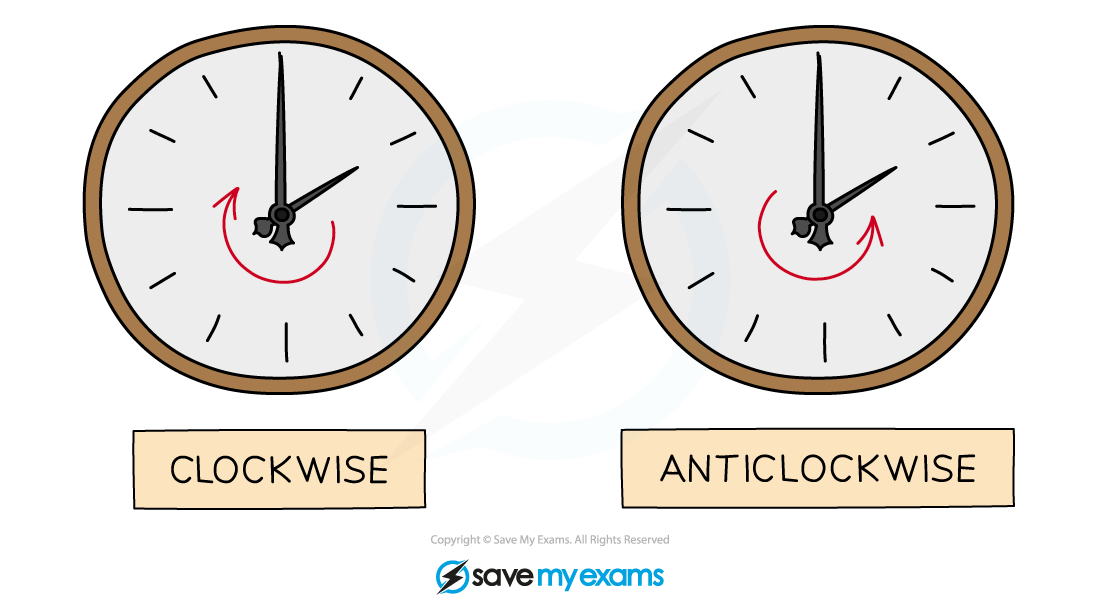
How do I rotate a shape?
STEP 1
Place the tracing paper over page and draw over the original object
STEP 2
Place the point of your pencil on the centre of rotation
STEP 3
Rotate the tracing paper by the given angle in the given direction
The angle will be 90°, 180° or 270°
STEP 4
Carefully draw the image onto the coordinate grid in the position shown by the tracing paper
How do I describe a rotation?
To describe a rotation, you must:
State that the transformation is a rotation
State the centre of rotation
State the angle of rotation
This will be 90°, 180° or 270°
State the direction of rotation
Clockwise or anti-clockwise
A direction is not required if the angle is 180°
90° clockwise is the same as 270° anti-clockwise
To find the centre of rotation:
If the rotation is 90° or 270°
Use tracing paper and start on the original shape
Try a point as the centre and rotate the original shape
If the rotated shape matches the image then that point is the centre
Otherwise keep picking points until one works
If the rotation is 180°
Draw lines connecting each vertex on the original shape with the corresponding vertices on the image
These lines will intersect at the centre of rotation
How do I reverse a rotation?
If a shape has been rotated to a new position, you can perform a single transformation to return the shape to its original position
A rotation can be reversed by simply reversing the direction of rotation
The angle of rotation is the same
The centre of rotation is the same
For a shape rotated by 45º in a clockwise direction about the point (0, 3)
The reverse transformation is
a rotation of 45º
in an anti-clockwise direction
about the point (0, 3)
Examiner Tips and Tricks
When you first go into the exam room, make sure there is some tracing paper on your desk ready for you
If there isn't ask for some before the exam begins
Draw an arrow facing up on your tracing paper
The arrow will be facing left or right when you have turned 90° or 270°
The arrow will be facing down when you have turned 180°
Double-check that you have copied the rotated image into the correct position
Put the tracing paper over the original object and rotate it again to see that it lines up with your image
Worked Example
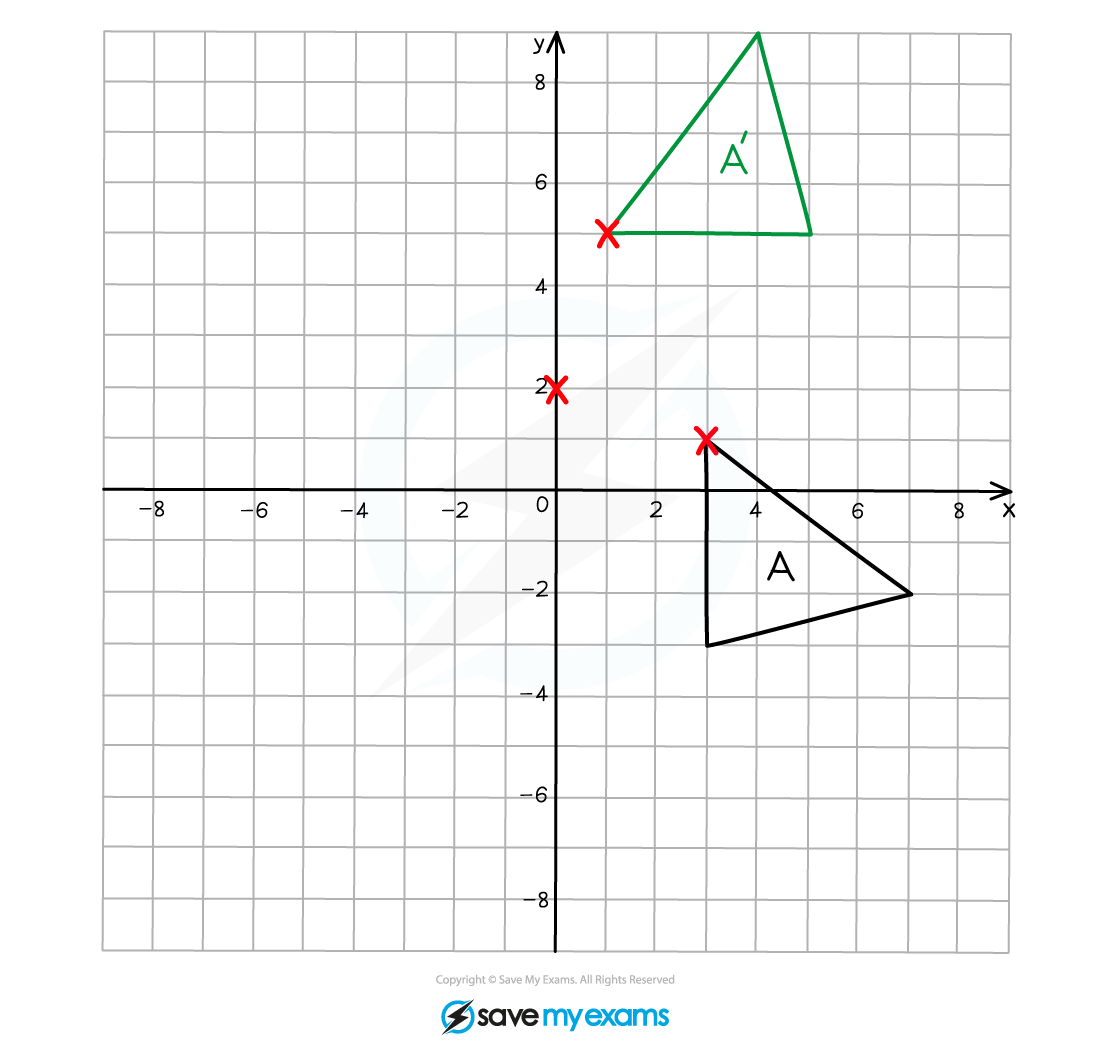
(a) On the grid below rotate shape A by 90° anti-clockwise about the point (0, 2).
Label your answer A'.
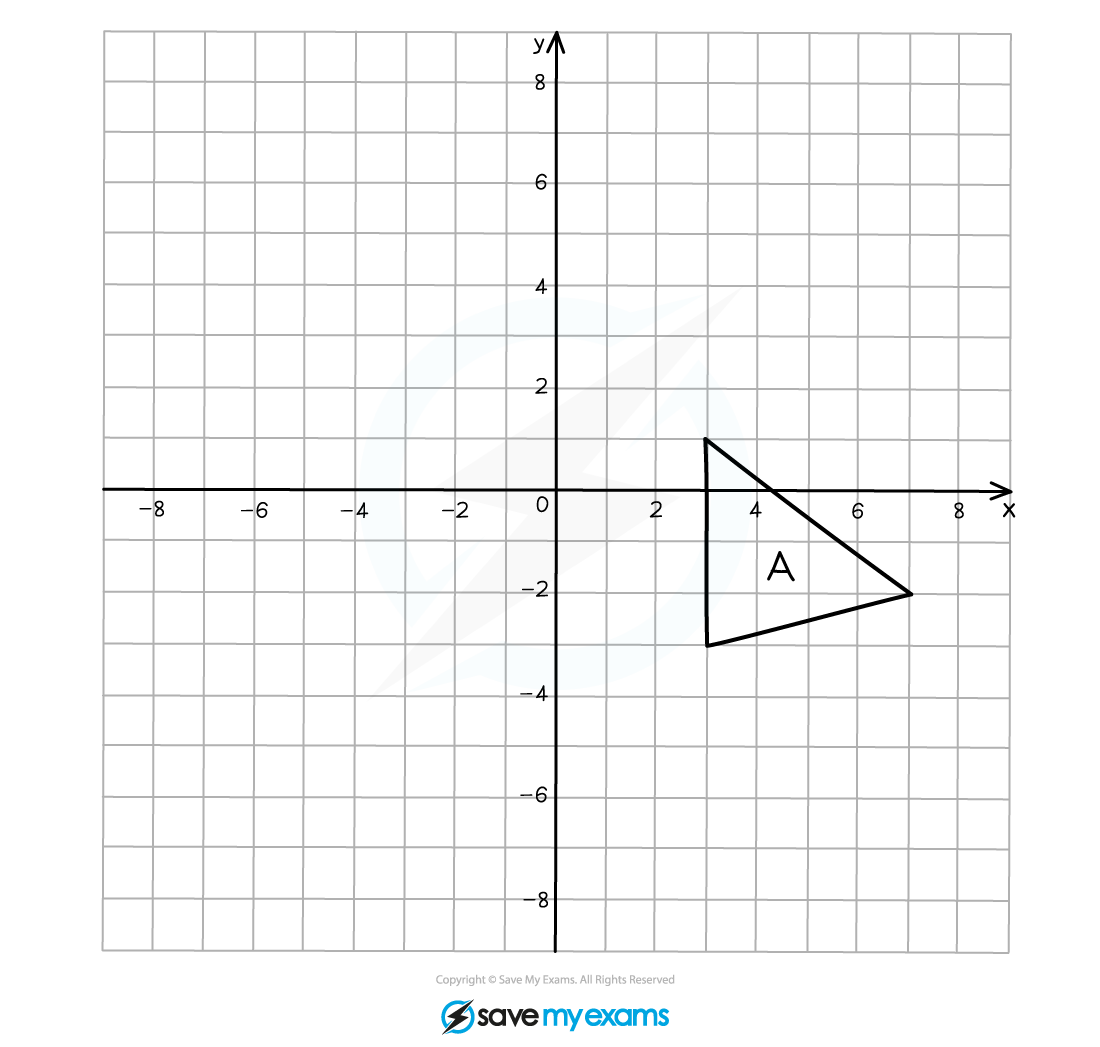
Using tracing paper, draw over the original object and mark one vertex.
Mark on the centre of rotation.
Draw an arrow pointing vertically upwards on the paper.
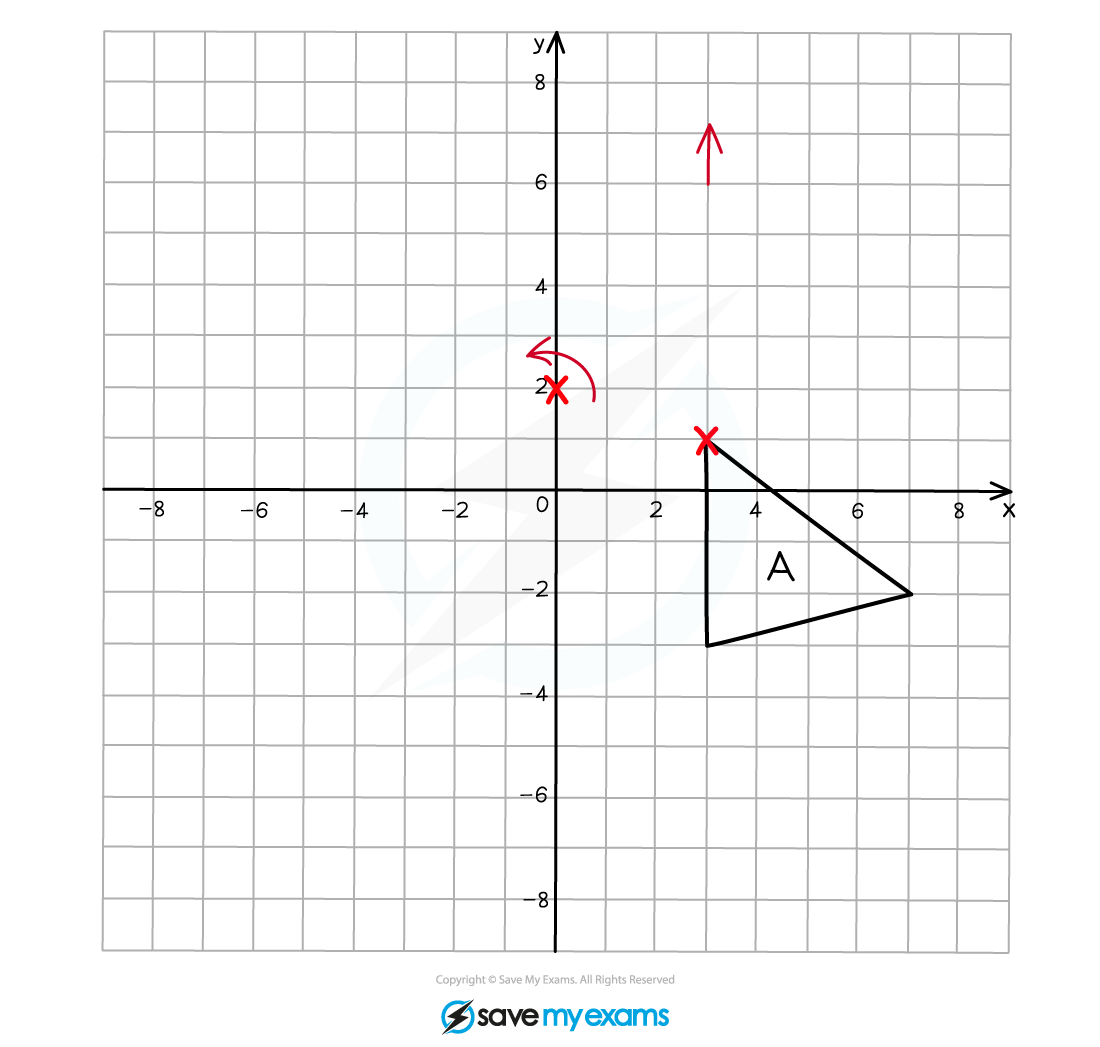
With your pencil fixed on the point of rotation, rotate the tracing paper 90o anti-clockwise, the arrow that you drew should now be pointing left.
Make a mental note of the new coordinates of the vertex that you marked on your tracing paper.
Draw the new position of this vertex onto the grid.
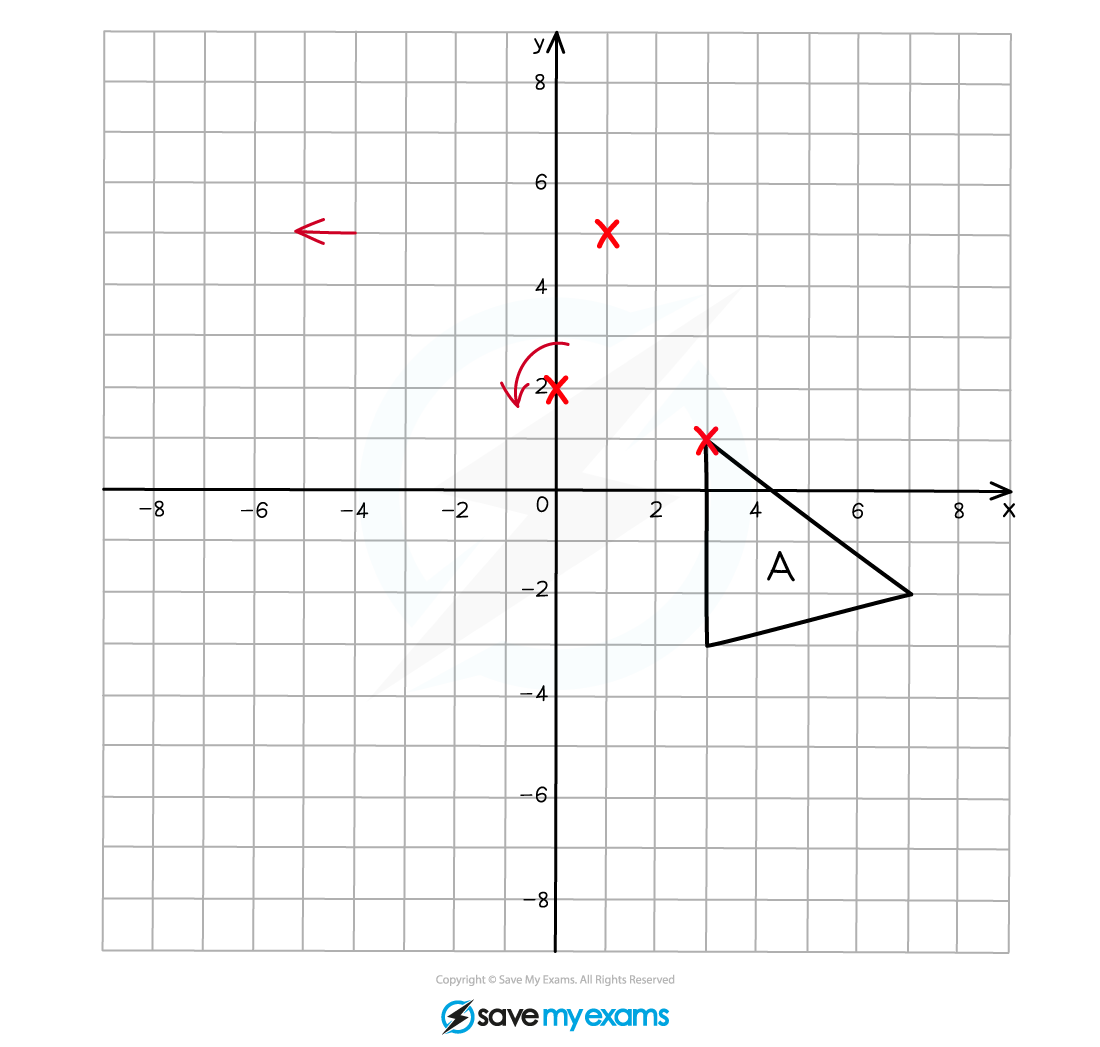
Repeat this process for the other two vertices on the triangle.
Connect the vertices together to draw the rotated image.
(b) Describe fully the single transformation that creates shape B from shape A.
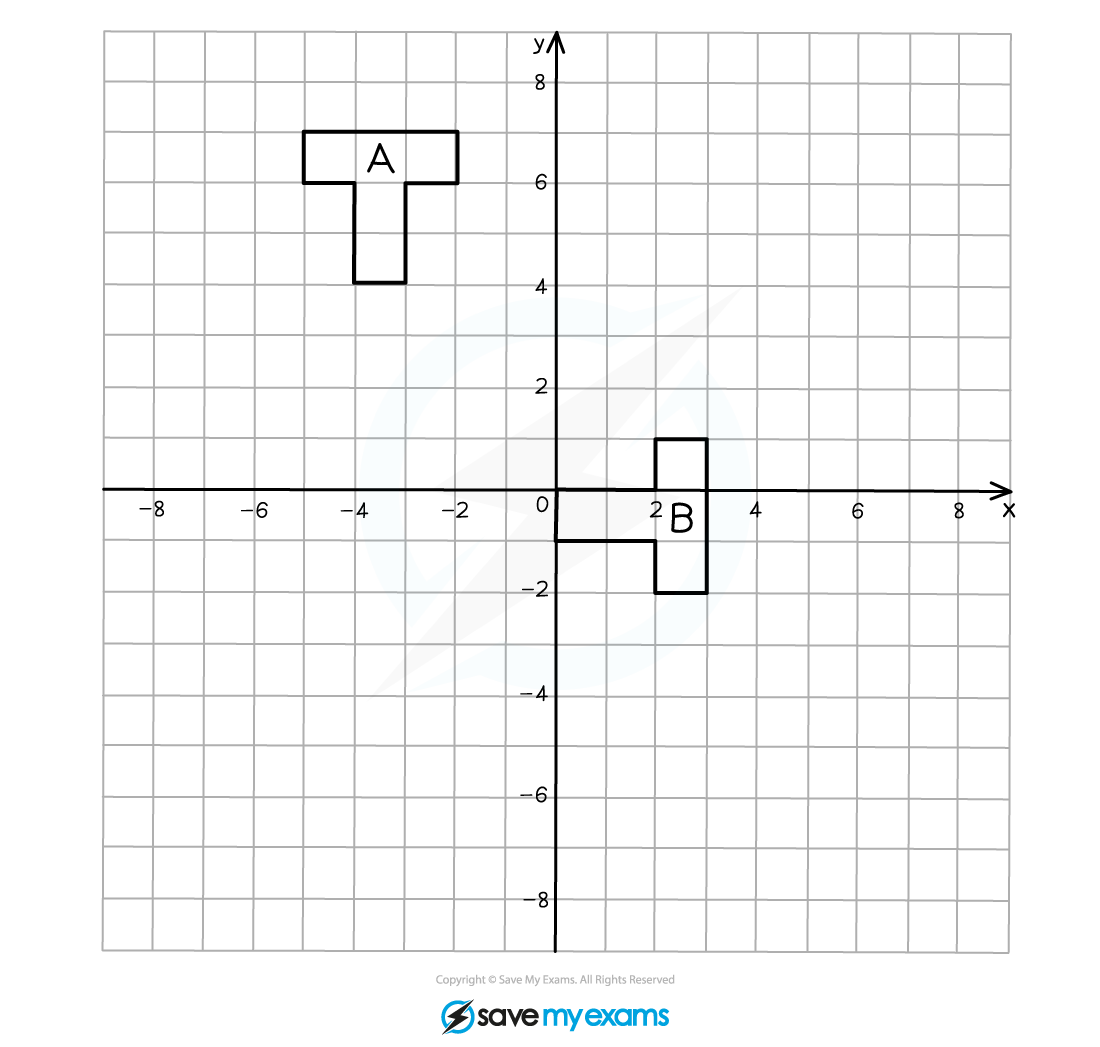
You should be able to see that the object has been rotated 90o clockwise (or 270o anti-clockwise).
You are likely to be able to see roughly where the centre of rotation is but it may take a little time to find its position exactly.
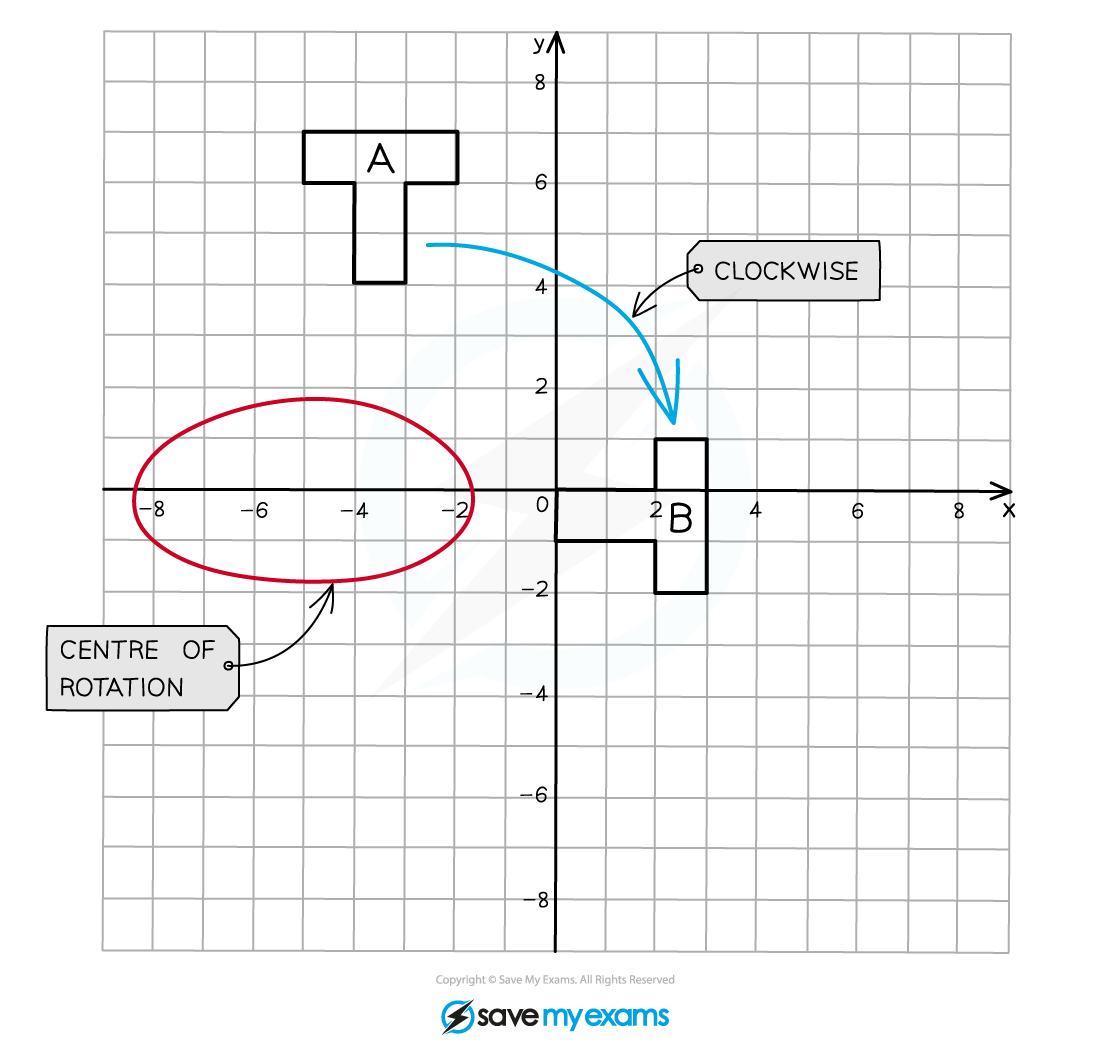
To find the exact coordinates of the centre of rotation you can play around with tracing paper.
Draw over shape A on tracing paper, then try out different locations for the centre of enlargement by placing your pencil on a point, rotating the paper 90o clockwise and seeing if it lines up with shape B.
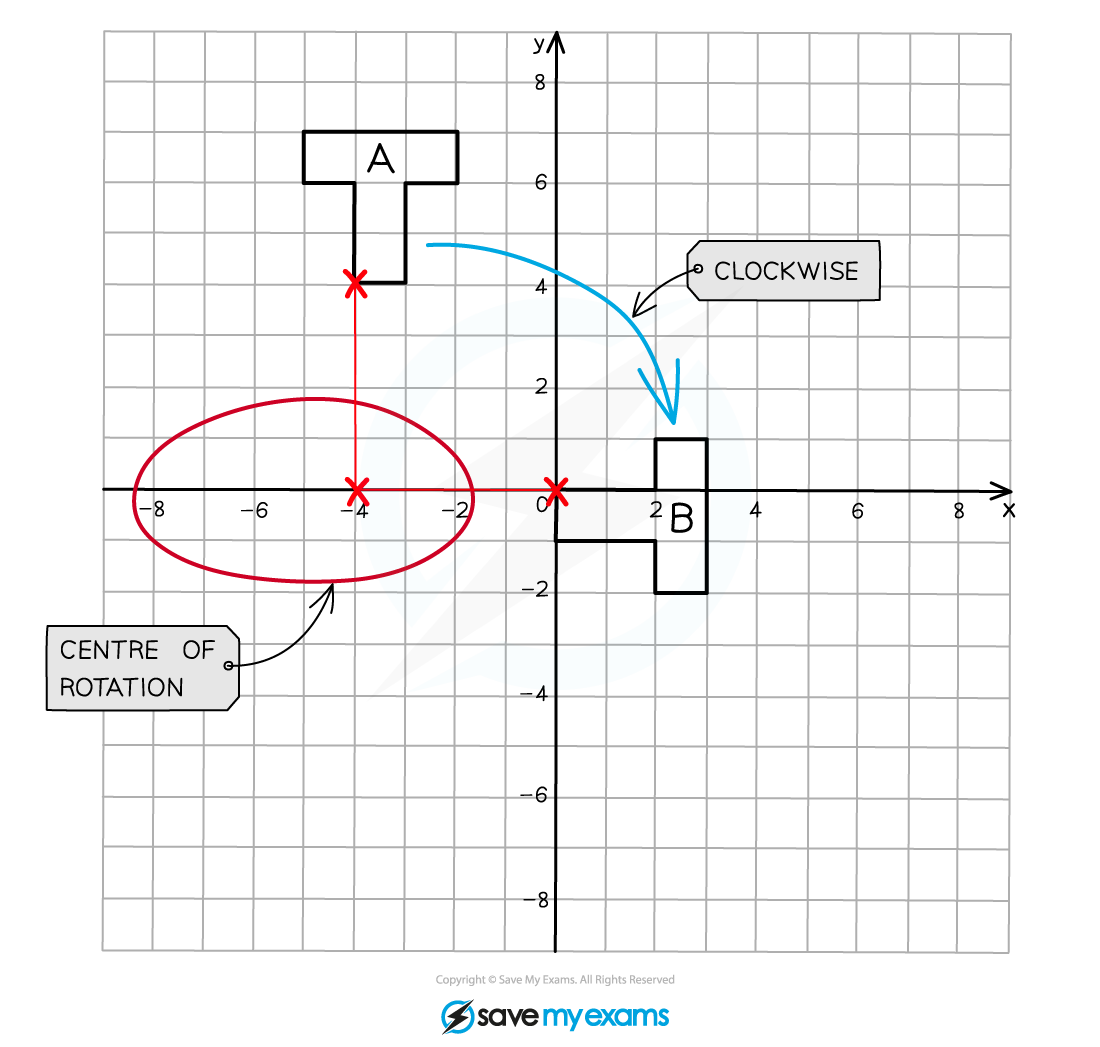
Write down the all of the elements required to fully describe the transformation: the type of transformation, the centre of rotation, the angle and the direction.
Rotation, 90° clockwise with centre (-4, 0)

You've read 0 of your 5 free revision notes this week
Sign up now. It’s free!
Did this page help you?

