Plant Transverse Sections (Cambridge (CIE) AS Biology): Revision Note
Exam code: 9700

Transverse sections: stems, roots & leaves
Transport systems
Plants need transport systems to:
Meet their metabolic demands (glucose, hormones, mineral ions are required for various processes within plants)
Efficiently move substances up and down, e.g.
Glucose from photosynthesis needs to be transported to parts of the plant that cannot photosynthesise
Water from the roots needs to be transported to the upper parts of a plant
Plants may store glucose in storage organs, e.g. tubers, and need to release this glucose and transport it to metabolically active parts of the plant
Plants consist of many layers of cells and so cannot rely on diffusion from cell to cell to supply all their needs, as this would be too slow
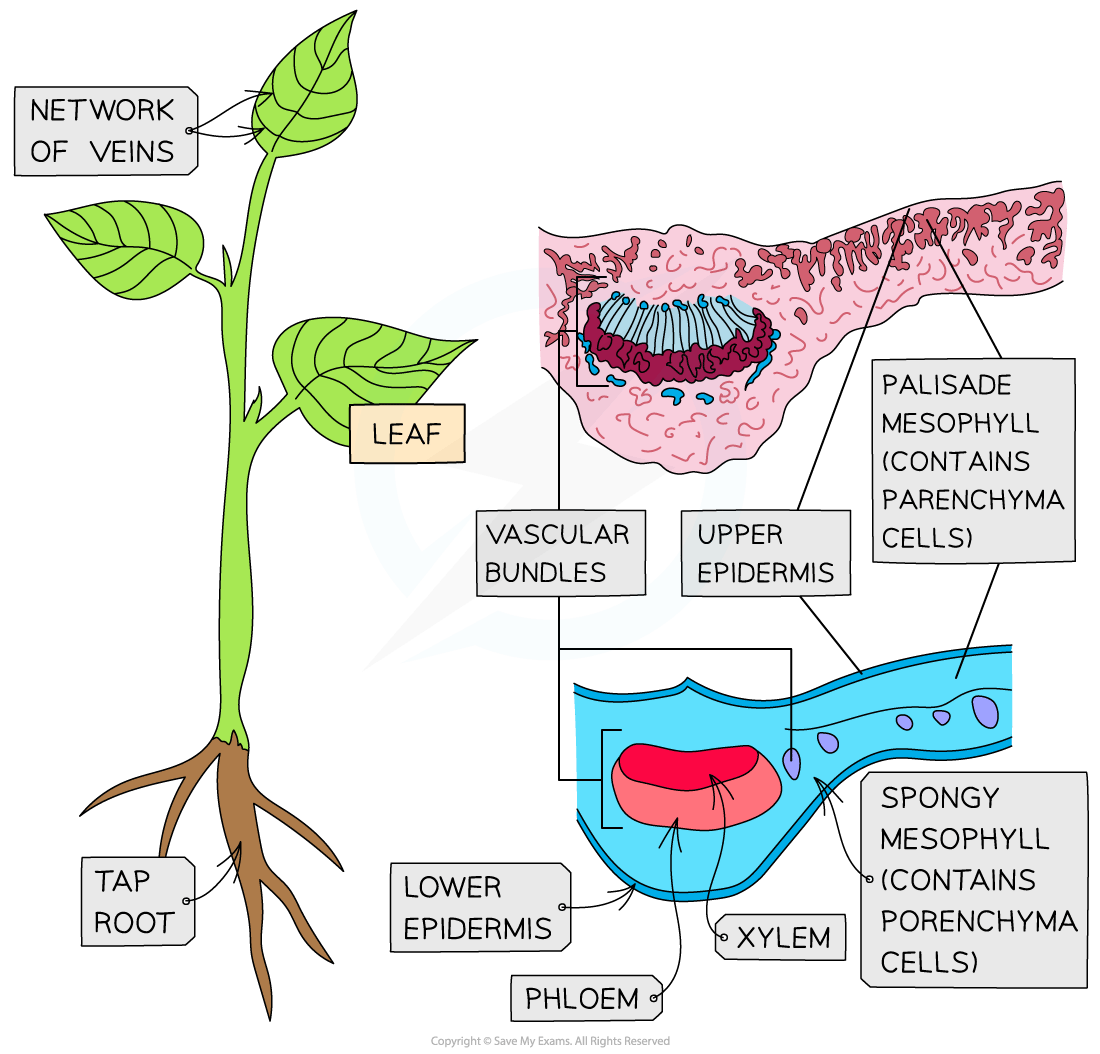
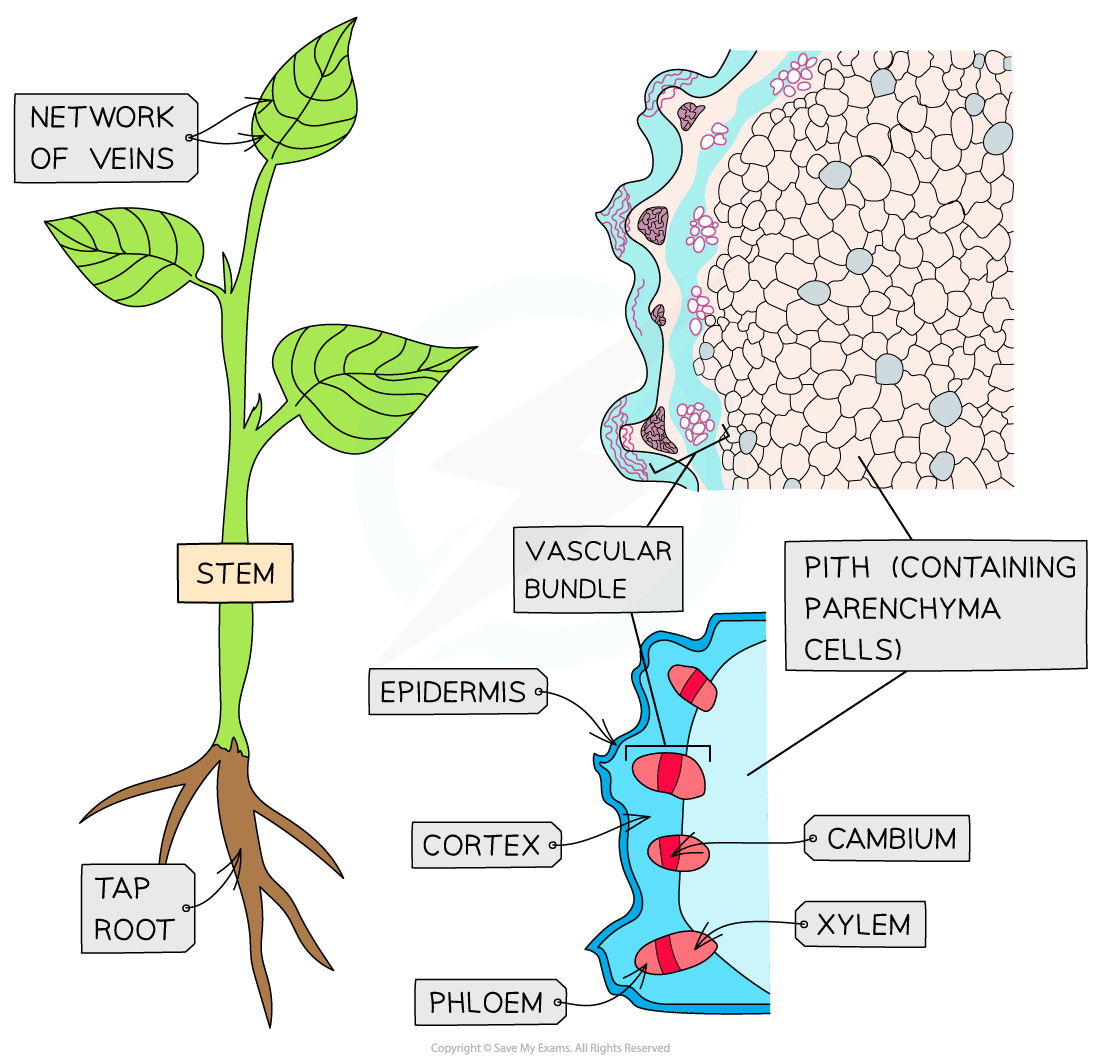
Plants therefore have a vascular system which involves a network of vessels (vascular tissue) running through the leaves, stem and roots
These three parts are the main organs involved in transport
The vascular system is comprised of two distinct types:
Xylem transports water and mineral ions from the roots to the rest of the plant
Phloem transports substances from the source (e.g. a leaf) to the sink (e.g. root)
The xylem and phloem are arranged together in vascular bundles
The bundles are laid out differently in the leaves, stem and roots

Worked Example
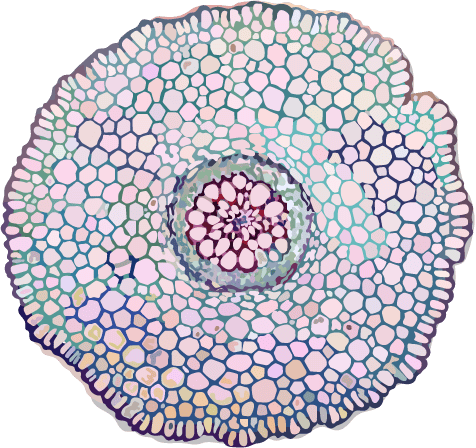
The micrograph below shows a transverse section of root tissue.
Draw a plan diagram of this section of root tissue.
Step 1 Draw the outlines of each section
Use a sharp pencil with no shading or sketching
Use a continuous line
Step 2 Add in a few required cells or structures
As this is to be a drawing of an image at high power you can add some simple details to distinguish between sections such as the xylem tissue at the centre of the root
Step 3 Add labels
Use a ruler to draw horizontal lines to each structure of interest
Label clearly with correct spelling
Step 4 Add magnification (if present on micrograph or question)
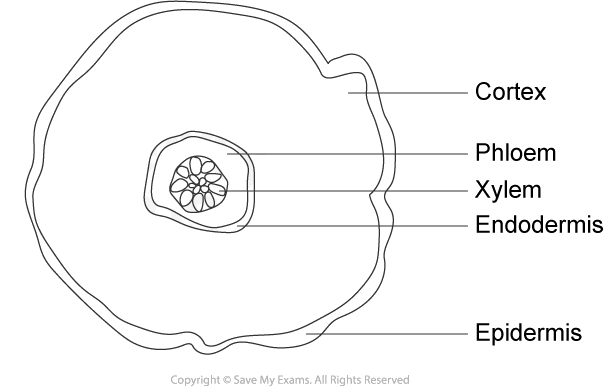
The 'before-and-after' images look like this side-by-side:

Examiner Tips and Tricks
When drawing tissue plan diagrams (which is common in the practical paper 3) you need to:
Read the instructions carefully
Draw a large diagram
Use a sharp pencil and do not shade (including the nucleus)
Use clear, continuous lines
When using an eyepiece graticule, use it to ensure you have correct proportions or if you are not using a microscope then endeavour to keep the proportions between tissues to scale
If drawing from a low-power image:
Do not draw individual cells
Read the question carefully as you may only have to draw a portion of the image
Include the magnification on the drawing
If drawing from a high-power image:
Draw only a few of the required cells
Draw the cell wall of the plant cells
Include the magnification on the drawing
When labelling, remember:
Use a ruler for label lines (and scale line if appropriate)
Label-lines should stop exactly at the structure (do not use arrows)
Don't cross label-lines over each other
Label all tissues and relevant structures (those requested)

Unlock more, it's free!
Join the 100,000+ Students that ❤️ Save My Exams
the (exam) results speak for themselves:

Was this revision note helpful?
Build on this topic